Repairing a teak hand rail

End result (before sanding)

Preparation is the key to success

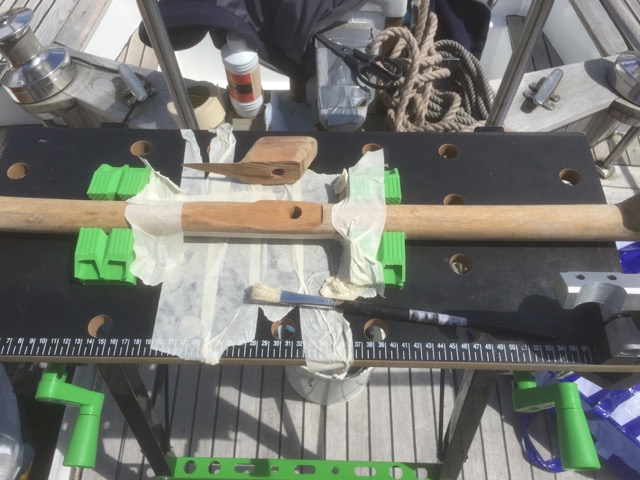
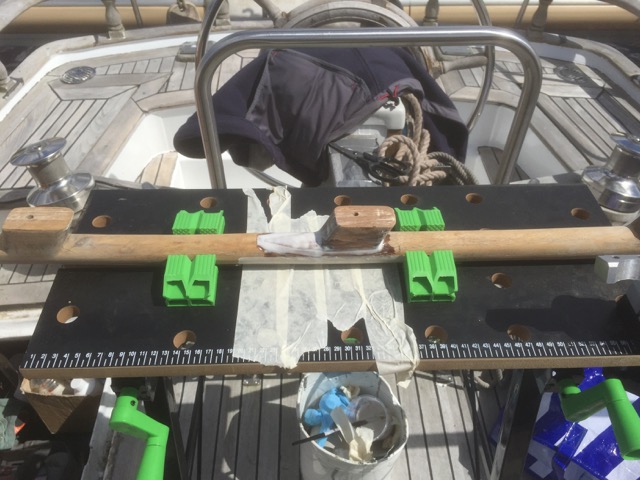
One of the teak hand rails was partially broken. To fix this issue the epoxy was taken out, to safe the day once again. Teak can be tough to repair because it’s a very greasy kind of wood. That is why most glues, paints or varnished don’t really bond well to teak. By first degreasing the teak with acetone and using a special diluted kind of epoxy that really impregnates the wood one can overcome this greasy problem. After the first impregnation layer was applied and became sticky enough (after an hour or so) a next layer with a more “glue like” character was made with a special kind of epoxy filler. This makes the epoxy thicker and thus easier to apply, plus it fills the gapes better.
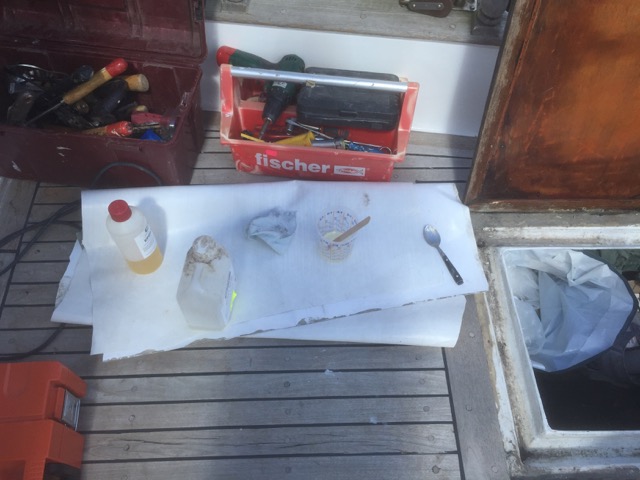
After the epoxy has dried enough (about 2-6 days) it could be sanded and varnished with a special kind of impregnation 2 component varnish which is specially made for teak. After 5 layers of this 2 component varnish, two more layers of extra UV filtering 2 component varnish fill be added for the finishing touch. I plan to do the same with all the other teak outside, with exception of the teak deck.

Building your own dish wash rack

I decided it was time for little side project. When doing the dishes I always find myself with the problem of where to easily put the wet plates and other big items. Usually I try to put them behind the faucet, but most of the time that ends up being a big mistake because the plates come falling down into the sink and then I can wash them all over again. Pretty frustrating stuff, so I had enough of that nonsense.
Somewhere in a YouTube video I saw a person who had made a special kind of dish wash drip contraption above his zink and found that so convenient that I wanted one as well. This would also have the benefit of no more manually drying the dishes. Just put them above the zink and let them drip. Super lazy I know. But also super handy.
So it was time to design one custom-made for the Seadog. I first put some effort in getting the design right so that the least amount of space was needed, for the most amount of storage. In the final product no space was wasted at all, because on top of this contraption one can put other stuff as well (in my case a small Jerry can with water). All in all, it worked out beautifully and every time I use it I can’t get over the fact that something so simple can make such a big difference.